

3m Wood Grain Vinyl & Trim Molding Buick Roadmaster
Posted by Kevin Messina on 24th Apr 2015
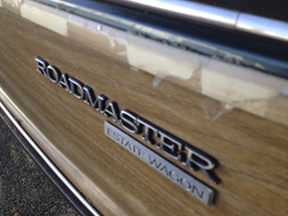
Hello there, owners of the original SUV. Today's blog is going to be about bringing life back into your woody style wagon. Unfortunately, even with the utmost care, the woodgrain decal material on the sides of your wagon will eventually fail. The biggest culprit is UV light. The sun is a killer, literally! That being said, an otherwise excellent condition wagon can look tired and even worn out on the outside because of failing woodgrain material or bad trim molding.
An also unfortunate problem is that the original material no longer is being produced for replacement. The original 3M Di-noc line is now being used to produce more realistic looking wood decal material for the architectural market overseas. Some of this film is of a high enough quality to use on autos, but the original patterns are no longer being printed. So it is likely that a complete replacement would be necessary regardless of the source of the film being used.
Stripeman.com has been printing a digital reproduction of several older, discontinued patterns for some time now. Although the patterns are correct, the color can never be a perfect match under all lighting conditions( subject for a later blog), so replacing a whole side is a minimum suggested project.
So, let's assume you've purchased your 3m wood grain vinyl film and you are ready to proceed. I am going to walk you through a Buick Roadmaster woodgrain refurb that was recently done at our shop.
First, wash everything. The car exterior, the door jambs and around the trim moldings, door handles, tag area and fuel door.
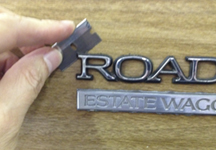
Next, remove the factory badges. This can be done by carefully sliding a single edge razor blade behind the badge to split the double backed adhesive tape that holds them on. Be careful when working with anything this sharp.
Now, its on to the trim molding. I've seen a lot of bent and twisted moldings from improper removal. Patience is key here, take your time. Most trim molding fasteners are similar in design, but you may have to research your particular model to be sure. On the Roadmaster/GM wagons, the moldings snap onto plastic clips that are locked on to studs that are protruding from the sheet metal. There are some small screws on the inside edges of the doors that must also be removed first.
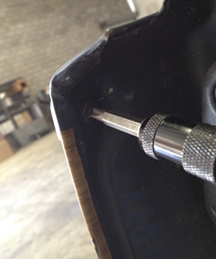
To release the trim from the clips, place a small plastic wedge under the molding to put a small bit of pressure against it. Now lightly tap the top edge with a rubber hammer or other non lethal banging device.
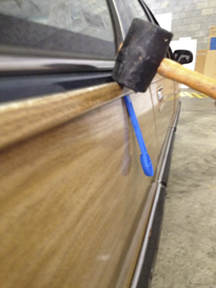
The trim will pop out at the bottom edge. Continue along the entire length of the molding until it comes off completely. Wheel openings will have some screws as well.
On this install, the original woodgrain panels were in fair shape, just very faded, so our client chose to have us install over the old film after cleaning well with alcohol. Also, this model has chrome moldings on the lower side which won't need to be wrapped, so we decided to leave them in place.
Once all the trim is removed, take all the plastic clips off. Do this by sliding them horizontally until they can be lifted off the studs. Now clean it again. You're gonna have a ton of dirt behind those old moldings, and any left behind can potentially fall behind your new woodgrain during installation and make for some nasty bumps.
Installation of the woodgrain film is very easy if you've purchased from Stripeman.com. We print ours on premium 3M wrap film. This material goes on dry and is easy to handle. If you have a helper, simply grab the corners, peel the backing paper off and lay it into position. Squeegee from the center out and wrap into the door jambs using a little heat to avoid wrinkles. Using a snap off type of razor, carefully trim around the door handles and fuel door using very light pressure so you don't cut into the paint.
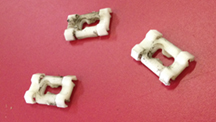
Now, on to the trim moldings. In this instance, the original material is delaminating and is not stable enough to wrap over. Starting on the backside of the molding, use your razor to trim any loose material away.
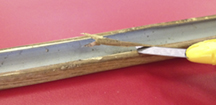
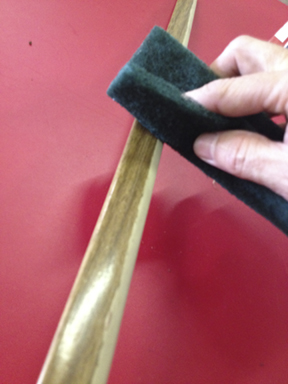
Do this on the top surface as well. You may need to sand the surface to make it smooth.
Clean it all again. Now cut the film you will use on the trim moldings down into strips. Make sure they are wide enough to wrap all the way around to the back of the trim. Once they are all wrapped with new woodgrain material, you can install them. Put your plastic fasteners back on and slide them horizontally to lock them onto the studs. Now take your freshly wrapped trim molding and hook it over the top edge of the plastic fasteners. Then just apply a little pressure and they will snap over the bottom edge. Replace your tag and any other trim that may have been removed and take pictures of your accomplishment.
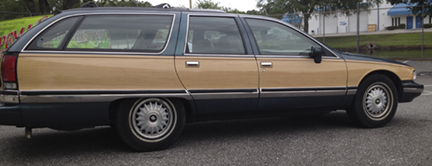
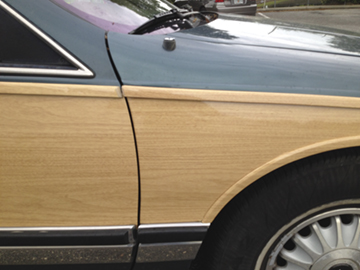
Our client chose to replace his original colored woodgrain material with the brighter color used on the trim moldings. I must admit, I really like the way the new color complements the dark green paint.
Also, are you of the opinion that a Buick Roadmaster with wood grain on the exterior is not cool? Think again! Go check out Dax Shepard's 700 horsepower Roadmaster HERE. Sweet!
That being said, you can order a 10 piece wood grain car exterior sample kit HERE.

